|
|
Disclaimers
Any application of the concepts illustrated here is entirely at the risk of the vehicle owner and/or operator.
Use of a computer in a vehicle as illustrated is intended for the passenger only. Use of a computer by the operator
of a motor vehicle may create an unsafe distraction.
The author believes that the design illustrated will not interfere with the operation of safety restraint systems
(air bags) but he has not performed any testing, so any and
all risk must be assumed by the user.
|
|
|
|
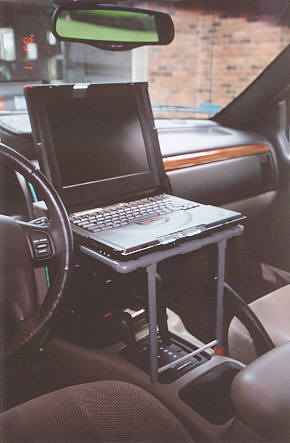
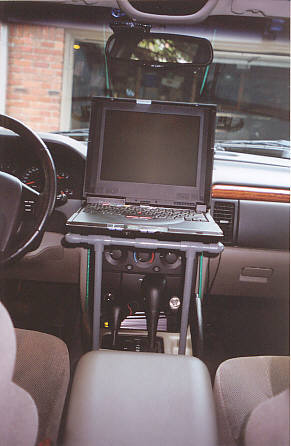
This mounting system was designed to allow a laptop computer to be used as easily as possible
while underway. The primary application being to run a GPS receiver and mapping software for navigation purposes.
http://www.delorme.com/products/gps.htm
Without some type of mount the computer must be held by the passenger, which can be awkward, uncomfortable, and
possibly very dangerous in the event of an accident and air bag deployment.
There are commercial mounting systems available that bolt to the vehicle floor or seat mounts, but I believe these
are best suited for larger vehicles. I would also have concerns about the use of some commercial designs with air
bags.
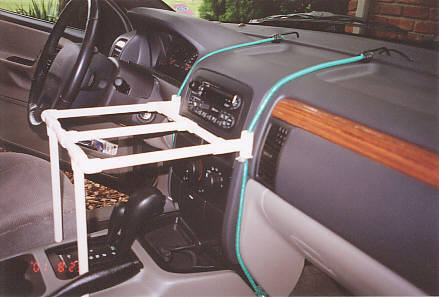
The concept I developed takes advantage of the molded "channels" found on either side of the center console
section of the 1999 - 2001 Jeep Grand Cherokee's dash. These channels readily allow the use of standard bungee
cords to support the front of the mounting system. The computer is mounted in the center console area of the dash
above the air conditioning ducts. A block of foam, with cut-outs for the computer's connectors, cushions the forward
edge of the computer and prevents the computer and connectors from pressing against any of the radio controls.
The mount can be very quickly installed and removed, and partially disassembled for easy storage. |
|
|
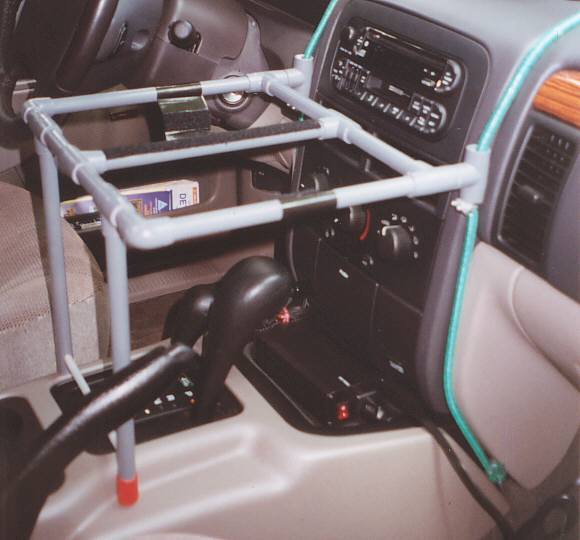
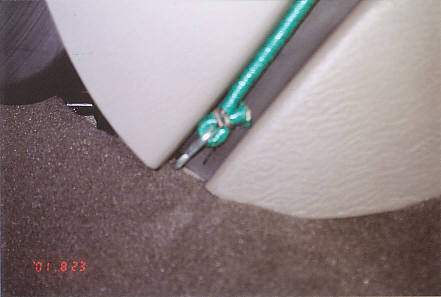
Close-up View Showing Velcro Attachments and "U"-Bolt Supports on Bungees
One long strip of Velcro provides fore-aft grip.
Two Velcro attachments made with vinyl tape provide additional lateral grip.
These are designed to be peeled off by pulling on the ends of the tape,
making it easier to remove the computer from the mount.
Also note the threaded rod (covered with plastic tubing) used to tie the legs together for rigidity.
Without this "strut" the PVC will flex with vehicle movement and the legs would be likely to separate
and fall off the console.
|
|
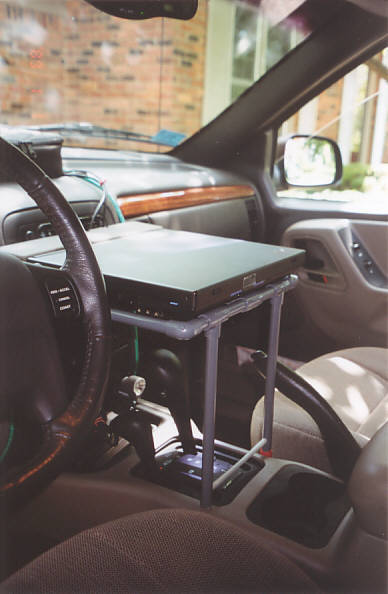
When closed the computer can also double as a "table".
- Radio controls are partially accessible behind foam block with the computer closed.
- Most audio system functions can be performed with the Jeep's steering wheel controls.
- Transmission and transfer case shift levers and emergency brake can be operated normally.
- Heating and A/C controls must be operated by "feel" and memory.
|
|
Materials
| ½" PVC pipe (8-10 ft) |
| ½" PVC T-connectors (8) |
| ½" PVC 90° connectors (2) |
| PVC cement |
| Threaded metal rod (from toilet float) |
| Flexible plastic tubing (split to cover metal rod) |
| Velcro with adhesive backing |
| Vinyl tape (for use with Velcro to make "peel off" fasteners) |
| Spray paint or colored vinyl tape |
| Rubber or cork plugs* (2 for "feet") |
| Bungee cords (2 x 30") |
| "S" hooks (2 - size 812) |
| Small "U" bolts (2) |
| Block of vinyl foam (obtained from packaging of a disk drive) |
*Note the use of a vinyl "thread protector" cap on one of the legs in the
photos.
This works extremely well as a non-skid "foot" but, unfortunately,
I only had one on hand and was unable to locate a source for more in this size.
|
|
Assembly
I can provide dimensions if necessary, but it is probably just as easy to measure the vehicle
and computer directly. After sawing and test fitting I used PVC primer and cement to glue all connections together
- except for the two legs, which can be removed for more compact storage. For highway use, gluing may not be required,
but it definitely is necessary for rough- or off-road use. Be careful with the fit of the right leg, as there is
just enough room to operate the emergency brake.
Finishing
I primed and painted the PVC with spray enamel. However the paint did not hold up very well
in use (particularly where the hand brake lever rubs against the right leg and where the computer rubbed against
the mount surface). A more satisfactory approach might be to wrap the PVC pipe with colored vinyl tape which matches
the vehicle's interior.
|
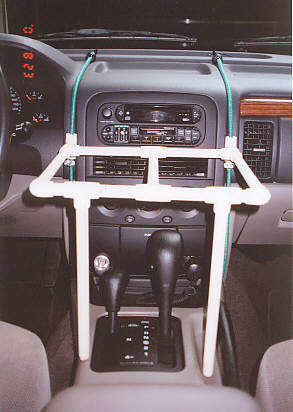
Pre assembly for test fit before cementing and painting.
|
|
Note top bungee hooks in defroster vent.
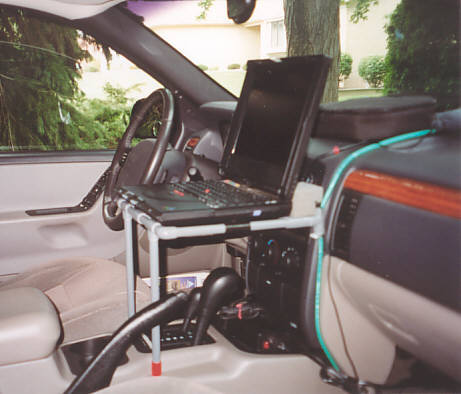
Computer mounted with foam block in place.
|
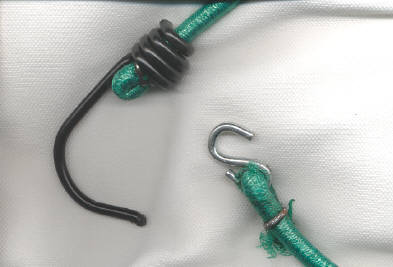
| The top bungee hooks are bent open to provide better fit in defroster duct. |
|
| The bottom bungee hooks were twisted off and replaced with "S" hooks to fit base
of console. |
 |
|
On Printing this Page
Since this page was designed with light lettering on a dark background
the following is suggested to facilitate printing:
Netscape Communicator 4.x:
Before printing - click File, Page
Setup, check Black text, (leave
Print backgrounds unchecked)
Internet Explorer 5.x:
No special settings required.
|
|
Link
to discussion at jeepsunlimited.com
Questions: pennhaven@twmi.rr.com
©2001 OptiProcess, LLC - All rights reserved.
Last Revised: September 23, 2001
|